While I have my own plastic FDM 3D printer, I have also had the privilege of designing for SLM printing and have been a part of the iterative process required to get extremely complicated parts into spec. I have combined the CAD and 3D printing sections as most of the interesting parts overlap. I most of my CAD experience in Catia V5 and V6. Last year I switched to Solidworks with the start of Project Dodo (see below)
SLM Parts
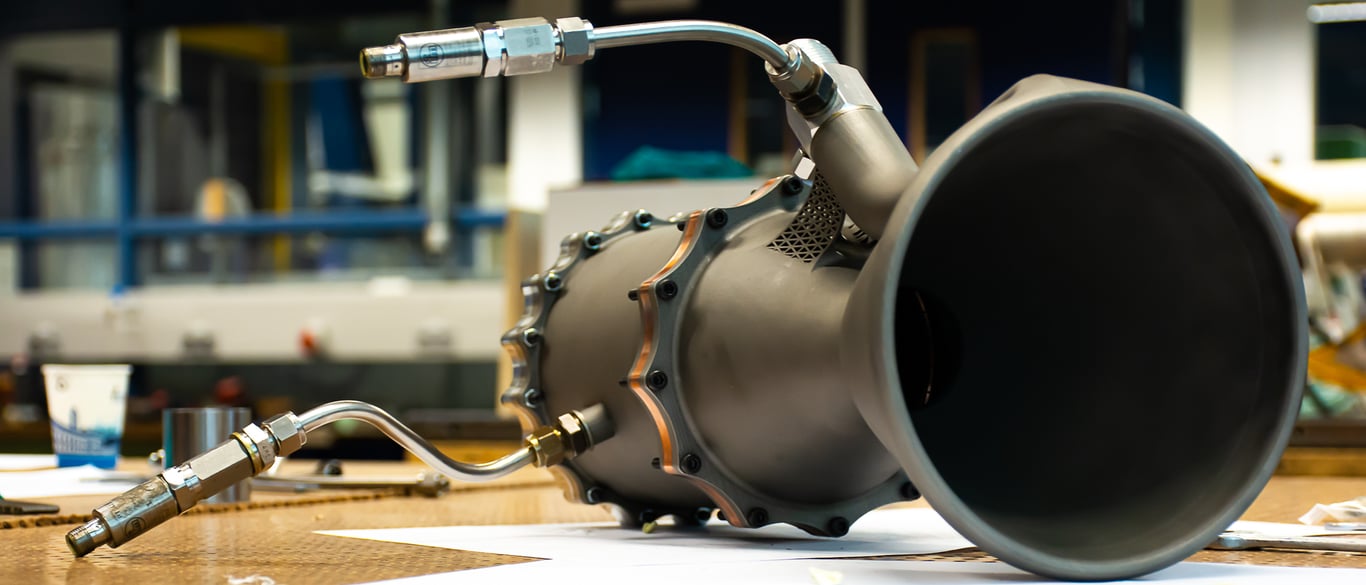
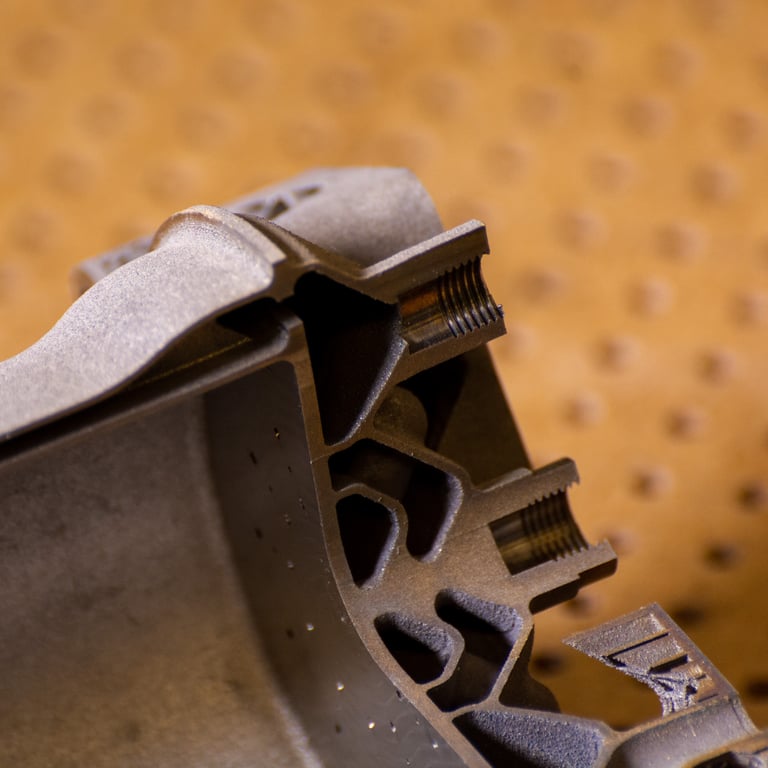
I worked closely on creating the nozzle of the Firebolt engine for Project Sparrow. The CAD was done in Catia V6. The whole engine is actually one skeleton part that we then used to generate the cooling channel geometry.
Firebolt engine:
.png/public)

Project Dodo
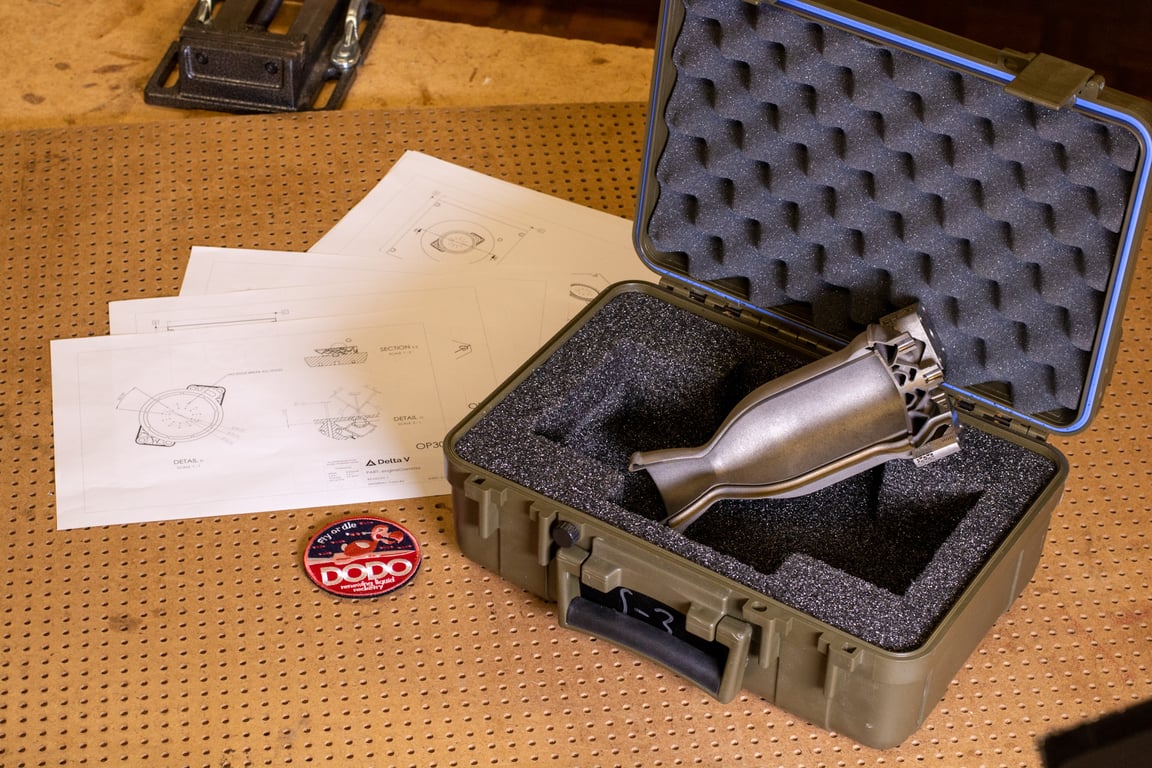
Project dodo is the next project that my friends and I started after we finished up with project Sparrow. We decided to build a rocket to fly at the European Rocketry Challenge in Portugal. We are utilizing all the knowledge we gained to push the limits of what metal 3d printing can do. Seen below are is the titanium engine and the carbon - titanium interface rings. Our flight tanks have been printed but at the time of writing we are not ready to share that publicly.

FDM Parts
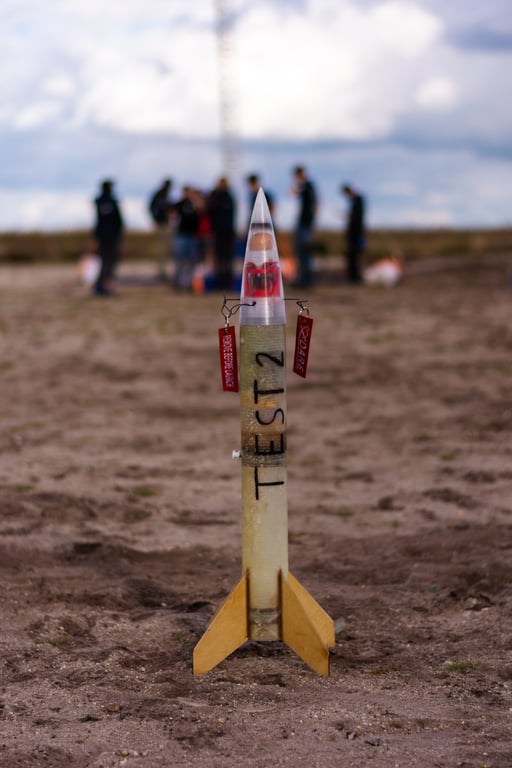
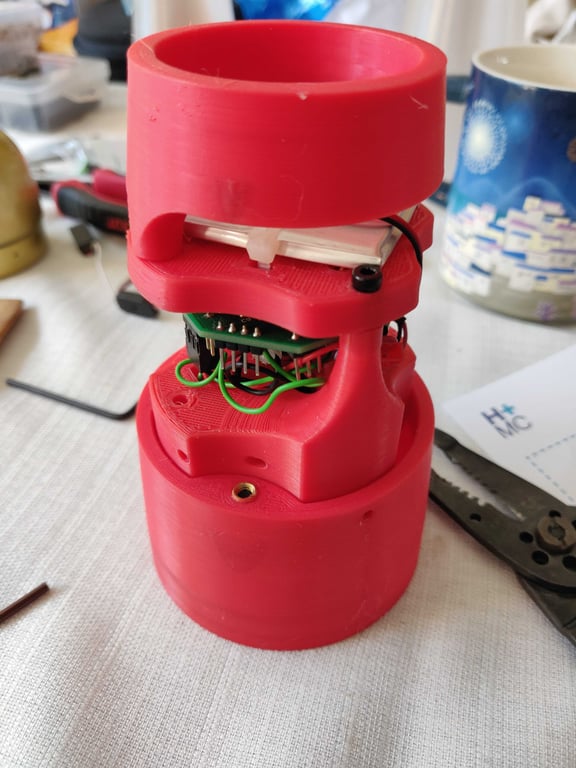
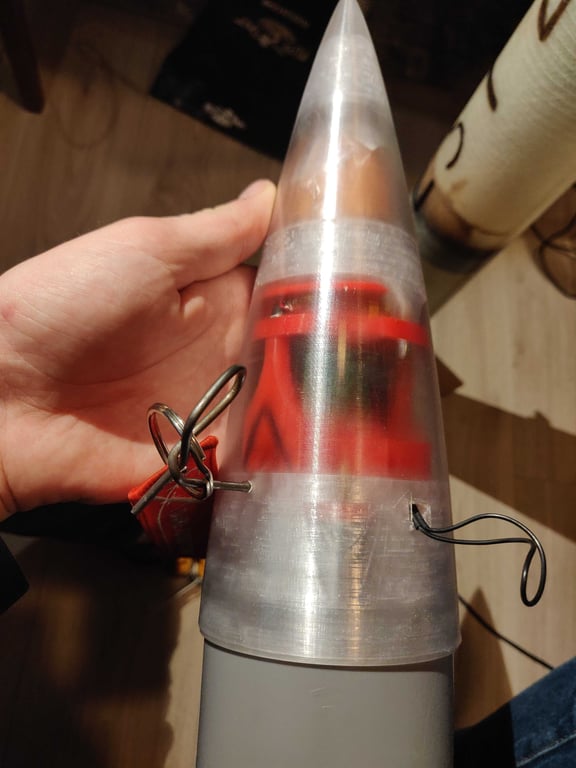
It is hard to put this after the beautiful SLM parts but being able to tinker and quickly iterate without investing heavily is incredibly important. Plus FDM parts can be useful and extremely light weight. I used my personal Ender 3 printer to make the following parts for a rocket I named Test 2.
The large external parts are glued into the vase mode nose cone. (clear in the final iteration). The vase mode and internal bracing made for an extremely lightweight assembly that was able to house all the required electronics while being able to assemble and disassemble everything with 1 long hex key. An easy press fit piece of PVC was used to couple the nosecone assembly to the rocket body.
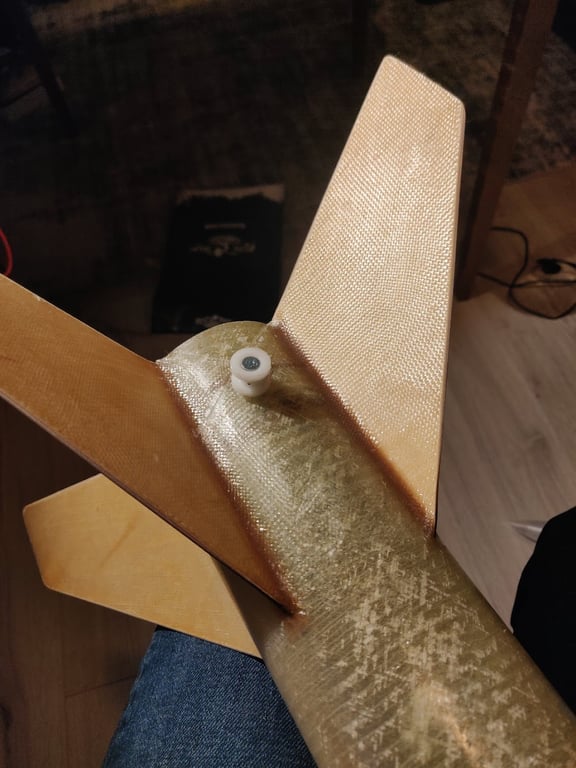
Composites
I do not spend the majority of my time working with composites but I have dabbled a little for the test 2 rocket. I created a tip to tip layup for the fins and utilized a laser cut core.